Showing posts with label NATURAL BEAUTY. Show all posts

5 Ways to Take Care of Natural Hair Easily Using Apple Vinegar


1. Make Shiny Hair

To produce sparkling hair, after wash your hair with apple vinegar. Mix ½ tablespoon of apple vinegar and 1 cup water, then rinse hair with a mixture of vinegar. After that, rinse with cold water. You can also use a mixture of apple vinegar with warm water as a natural conditioner to produce more radiant hair.

2. Make Hair Smoother


Apple vinegar contains alpha-Hydroxy acid which helps in improving hair quality. Washing the hair with apple vinegar also helps in closing the cuticle and making the hair smoother.

3. Helps Hair Growth


Nutrients contained in apple vinegar stimulate hair follicles so the hair grows fast. The trick is to wash your hair first with apple vinegar before you use sampo.Lakukan this for 2-3 times a week for maximum results.

4. Can Overcome Dandruff


The anti-bacterial and fungal properties of apple cider help in preventing dandruff, skin infections, itching, improving blood circulation in the scalp and making hair healthier. Anti-bacterial and fungal properties also inhibit the growth of Malassezia furfur which is a fungus that causes dandruff.

5. Overcoming Hair Loss


Hair loss can be caused by the buildup of dead skin cells. For that you can use a mixture of apple vinegar with brown sugar. Then use a mixture of apple vinegar with water to rinse it, and then clean the hair with water. Or you can also put apple vinegar mixed with water into the sprayer. Spray apple vinegar onto the scalp to deal with hair loss or thinning hair

Tips For Foot Feet Not Growing Fast After Shaved


1.Basahi Area To Be Shaved With Warm Water
This is so that the pores of skin and hair follicles so open. Wet the area to be shaved with warm water, let stand for 2-4 minutes. This method allows Minasan to shave to the tip of the feather. Not recommended to shave in a dry leg, because it potentially injures the skin.

 2.Minasan can also use scrubs containing salt to remove dead skin cells and dirt. In order for skin irritation to be avoided and feathers become more easily lifted, use a shaving cream or hair conditioner that is wiped on the foot. Instead, do not use bath soap. "The bath soap does not provide enough lubrication for the razor to glide perfectly on the skin, instead pose a risk of injury," said a Dermatologist, Ellen Gendler MD.

3. Shave from Bottom to Top
Begin shaving movements from the bottom of the foot, for example the ankle. Then move up, up to the knees, or the inside of the thigh. Shaving in contrast to the direction of hair growth will help the shaved leg hair perfectly, to near the roots of growth. So that the legs do not grow quickly after shaving, shave with a long pull up. Try to make the movement smooth and flat. But, do not forget to rinse the razor after a while with hot water. The goal is to clean and remove the clogging fur. To make sure no part is missed, Minasan can also repeat shaving movements for several times.

4. The Right Shaver Tool
Use the right shaver, for example by choosing a shaver that has more than one blade. The goal, so that the shave cleaner and feathers do not grow fast again. Instead, use a new and sharp razor. In addition to keeping razors clean and rust free, using a razor that is not too sharp will only hurt the skin. Meanwhile, razors are used for several times can trigger the growth of acne, rash, and become a gathering place of bacteria to potentially cause infection. If you want maximum results, Minasan can also use a special cream shaving cream to be applied on the foot. Remember to avoid creams or shaving gel that contain perfume, because it can cause irritation, especially for sensitive skin. Well, when shaving legs, hold the skin surface tightly to prevent rash (reddish spots). But if there is still a rash, it is advisable to immediately put the baby powder.


5. Apply Moisturizer
In order not easy to grow leg feathers after shaving, Minasan can apply moisturizer, such as lotions, after shaving. It is recommended to immediately apply moisturizer when the shaving area is still slightly wet. In addition to being able to keep skin smooth, the emollient content of the moisturizer also causes hair or hair to grow smoothly. If necessary, to prevent irritation of the skin, Minasan can also choose aftershave cream or skin moisturizer with antiseptic. Do not forget to first clean and wash the freshly shaved area with cold water, so that the skin pores closed again.

HOW TO MENUTRITION NAIL


Lemon & Coconut Oil

Citric acid in lemon juice can remove color changes in the nail, while lauric acid in coconut oil can strengthen and nourish the cuticle. Take a tablespoon of coconut oil, add 5 drops of lemon juice, then heat it in the microwave for 20 seconds. Dip your nails into the solution, leave to soak for 10 minutes and massage well your nail surface. Do it once a day.

Orange juice

Orange juice is high in folic acid and vitamin C, both of which promote nail growth. Soak your nails in orange juice for 5 minutes, and then rinse
until clean. Then dry with a clean towel.

Garlic

Garlic contains sulfur, which is known to nourish and strengthen brittle nails. Boil a cup of water, add 1 crushed garlic clove and one teaspoon of lemon juice. Let it simmer for 10 minutes and let it cool. Put the solution into an empty nail polish bottle. Apply on your nails every night before bed.

Olive oil

Olive oil containing vitamin E, can stimulate blood circulation and facilitate the process of growing nails faster. Before bedtime, massage nails and cuticles with warm olive oil. Leave overnight. Repeat every night.

Coconut Oil & Honey

Lauric acid in coconut oil when combined with amino acids from honey, can make the nails glow. Mix coconut oil with a teaspoon of honey, massage on your nails for 5 minutes. Leave on for 15 minutes, rinse and dry. Repeat 2 times a week.

Tomatoes & Olive Oils

The amount of biotin and vitamin A present in the tomato can nourish the nails with the maximum. Mix 1 tablespoon of tomato juice and olive oil. Soak your nails in this solution for 10 minutes. Do this several times a week, until the condition returns prime nails.

Benefits of Olive Oil for Face Beauty


1. To remove makeup on face
One of the benefits of olive oil for the face is to remove makeup makeup on the face. You can use pure olive oil after wearing makeup everyday with a way smeared and gently massaged on the face.

Use olive oil as an initial makeup makeup cleanser on your face, afterwards rinse with a towel soaked in warm water. Alternatively, you can use a soap containing olive extract to rinse your face

2. Moisturize the skin
Did you know that olive oil has properties that increase the moisture in the skin? Yes. If you have dry skin peeling, you can apply 1 to 3 drops of olive oil on the dry face.

You can also outsmart the benefits of olive oil for the face by mixing face moisturizing cream with a few drops of olive oil to hydrate the skin to keep it moist and smooth.

3. Overcoming skin problem
Olive oil is proven to relieve skin conditions that are dry, itchy, or inflamed. The reason, olive oil contains oleochantal that can relieve discomfort due to inflammation in the skin.

How to use it is very easy, you just need to add a few teaspoons of olive oil into the hot tub. Then you can either bathe or just rinse face with water tank mixed with olive oil.

4. Scrub facial skin
In addition to moisturize and overcome the itchy skin inflamed, you can make a natural face scrub by using olive oil and sea salt blend. This is very useful if your facial skin is scaly and dry,

Mix 3 teaspoons of virgin olive oil with 5 teaspoons of sea salt. Then, gently massage into the side area of ​​the nose and other dry facial parts. A mixture of salt and oil can peel dry skin while increasing the moisture in your face.

However, do not carelessly use olive oil for the face
It is widely known that olive oil has useful uses for your face. But, this is not recommended if you have a sensitive skin type. Especially if you face acne and experiencing dermatitis problems.

The reason, a study found that the use of olive oil for the face of babies and certain adults can make the skin more inflamed or allergic.
Studies related to the use of olive oil in babies, actually feared could be a trigger eczema in the future. This also applies if you or your baby has a family history of eczema.

It's good, you do an allergy test before using olive oil for the face. Try rubbing a few drops of olive oil in your hands, observe the change or sensitivity of the skin afterwards. If within 24-48 hours there is no reaction, you are safe to use it. However, if there is a reaction such as reddened or itchy skin, you should not use olive oil for your face.

How To Thicken Hair Healthy And Natural


How to thicken hair. Having natural dense hair may be a dream of women. This is because for them, hair is one of its crowns. For men, it may not be a problem, because with bald hair sometimes men still look cool.

But sometimes experience thinning or hair loss, this is due to lack of hair care and is caused by a variety of chemicals that may exist in hair dye when you color the hair. How to thicken a thin hair would require special care and adequate nutrition.

How to thicken hair Hair nutrition to get thick hair should be done every day. In general, the use of shampoos to thicken hair is not good, this is because the use of shampoo can not be used every day which when used every day can make hair dry. Here's how to thicken hair.

How To Thicken Hair
1.Green tea
How to thicken hair with green tea
Green tea is also useful as a way of thickening hair. One cause of hair loss and thin because of damage to hair follicles. This is due to the active enzyme named 5-alpha reductase resulting in increased hormone dihydrostestosterone (DHT) which can shorten the life of hair follicles. With a compound called catechins found in green tea that can inhibit the increase of hormone dihydrostestosterone (DHT) so that hair is no longer easy to fall and not become thin. Green tea plays an important role in preventing damage to hair and skin due to the effects of free radical attacks every day. So for those of you who are heavy coffee addicts, and want to prevent your hair loss should be to reduce caffeine intake in your body during the treatment.

2.Aloe vera
How to thicken hair with aloe vera
Aloe vera has no doubt the benefits for hair health and can also to thicken the hair. First, split the aloe vera and take the inside (like a stiff gel). Rub the inside of aloe vera into the hair evenly and wait until up to about 1 hour, rinse with clean water.

3.Sufficient for vitamin A
How to thicken the hair to meet the needs of vitamin A
A healthy source of vitamin A such as carrots, spinach, milk, eggs, and much more. Sufficient vitamin A can make hair thick.

4.Meet the nutritional needs of hair
How to thicken the hair to meet the nutritional needs of hair
Hair needs enough nutrition to grow healthy. Nutrition is important for hair health such as protein and vitamin B complex. Sources of nutrients needed by hair, such as: egg yolk, meat, fresh fruits, and green vegetables.

5.Egg whites
Egg whites can increase the volume of hair to be thicker and prevent hair loss. Rinse hair with water so the hair becomes moist. Separate the egg whites with egg yolks. Beat the egg whites that have been separated with the yolk and apply egg whites on the hair and scalp until evenly distributed. Let stand for 1-2 hours. You can clean your hair and dye it to clean with cold water. To remove the egg white odor, can use shampoo.

6.Olive oil
Olive oil can be used to thicken and discolor hair. How to use it, apply olive oil to the hair evenly and better use before bed.

7.Candlenut
How to thicken the hair with pecan
Prepare candlenut and puree first. Boil with water until hazelnuts remove the oil. The hazelnut oil will be seen floating on top of boiled water. Take the hazelnut oil, apply to the scalp evenly and do how to use this pecan regularly.

8.Coconut milk
How to thicken hair with coconut milk
Take coconut milk to taste. Apply on hair from root to tip of hair. Let stand for 30 minutes and wash hair. Coconut milk used to thicken the hair should be coconut milk. Do it using coconut milk regularly.

9.Honey
How to thicken the hair with honey
Honey has been believed to have benefits to nourish hair. Honey is usually used as a formulation material on shampoos used to thicken hair. Apply honey to hair evenly, let stand 10-15 minutes. Wash your hair and do at least 1 time a week.

10.Celery
How to thicken hair with celery
Use stalked celery leaves. Wash your hair first and rub the stalk of celery that has previously been smoothed to the scalp until evenly distributed. Gently massage the scalp. Let stand for a moment and closed with a shower cap for approximately 1 hour. Clean the hair until it is completely clean. Perform at least 2 times a week.

11.Scalp massage
How to thicken the hair with a scalp massage
The cause is thinned

BENEFITS OF FILLER INFLUENCES AND RISKS


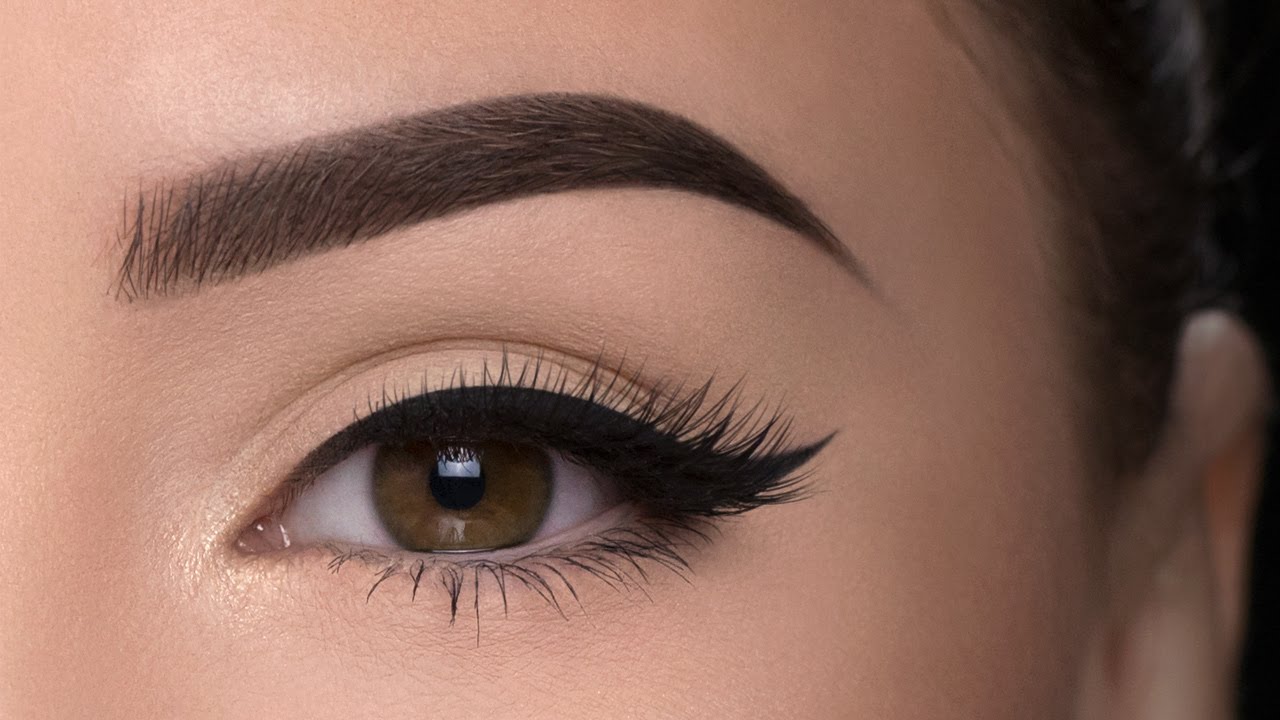
To get a beautiful face and beautiful body shape sometimes people always think of instant ways to get it all. Being satisfied when we look more beautiful than we are now. One of the instant techniques to change our face in addition to plastic surgery is by injecting filler.
Filler is a technique of injecting hyaluronic acid (HA) substance down the skin layer to increase volume and tighten the skin. Hyaluronic acid itself is already present in our body but the number is limited. The ideal filler is a non-permanent filler that does not cause an allergic reaction, does not cause inflammation, can be absorbed by the body and provides a natural look. Non-permanent fillers, although practical and painless, do not last a lifetime like plastic surgery, generally last 6-12 months. The injected HA will blend with the natural HA in the nose and gradually absorbed completely by the body.

For reasons of comfort and safety of patients, should choose to use a reliable dermal filler products, registered in the Ministry of Health and has proven results, one of which is Restylane. Dental filler Restylane uses NASHA (Non Animal Stabilized Hyaluronic Acid) technology, where the hyaluronic acid contained therein is stabilized and minimally modified to have a high biocomponent power that makes Restylane able to decompose naturally in the body and minimize allergic events.

Main Type of Filler

There are different types of fillers that can be used. Different facial areas require different types of fillers. Each type contains different materials with different resistance levels. Here are some common types of fillers available, along with their characteristics.

1. Hyaluronic acid
Hyaluronic acid is a natural part of the skin that generally diminishes with age. For fillers, these substances are available in a natural and synthetic form. Here are the characteristics:

-Rarely found allergic reactions to the use of this type of filler.
-Get gels with slightly thick composition.
-can be used in restricted areas such as the right or left corners of the mouth, filling the lips, and filling the basin under the eyes.
-If the result is not as expected, this material can be neutralized by injection of -henzuronidase.
-Can last for 9-12 months.
The result can not be seen instantly, like any other filler.

2. Collagen bovine
-Her from cowhide. Collagen is the oldest filler and is called the best of all that exists.
-Prices are more affordable and more effective.
-Patients are required to undergo allergy tests because this material can cause allergic reactions.
-Because the body naturally breaks collagen injections, it needs to be injected 2-4 times a year.
-In addition there are also human collagen bred from human cells.
-No first allergy test required because this type of collagen does not cause an allergic reaction compared to bovine collagen. Even so the injection still needs to be repeated every 3-6 months. Because it is relatively safer, then this human collagen is more expensive.

3. An autologous lard or fat cells in the body
Obtained by lifting a bit of excess fat in one part of the body, such as the stomach, thigh, or hunchback to be injected under the surface of facial skin.

-Generally there is no allergic reaction because the injected material is its own skin.
-The result can be permanent although different for each person.
-Can last 1-12 months.

4. Biodegradable artificial polymers
-Can last up to 24 months.
-After injection, this material will stimulate skin cells to make collagen.
Poly-L-lactide type (PLLA) has been widely used as a material for leather lining and is not toxic.
-There is also Polymethyl methacrylate (PMMA) which was once used as a bone-adhesive before it was eventually used as a filler.

5.Calcium hydroxyapatite
- Holds up to one year.
-It is necessary to fill in areas requiring multi-volume injections, such as cheeks and chins.
-Made from minerals that strengthen bones.
These minerals are planted in small particles which are then dissolved in the liquid. This liquid is then injected.

6.Collagen bovine and microscopic plastic beads (Artefill)
-This material is a gel suspension made of poly / methyl methacrylate, collagen bovine, and lidocaine.
-As the collagen gradually runs out, the plastic bead permanently stays beneath the surface of the skin.
-Can last 1-5 years.

Treatment of the most sought after patients is removing eye bags and shading the nose. Especially the nose, because the tendency of the Indonesian bones nose is not high or the tip of the nose is less pointed.

Doctors need to provide consultation on any face area that needs to be filler, tailored to the needs of the patient. And able to provide advice for patients if the patient's desire is less in accordance with the needs of treatment. The doctor should explain clearly what the procedure of injection is like (from anesthesia to injection completed), any reactions that can arise after the injection (a little redness, swelling, itching, bruises, and pain).Because the Restylane filler is based on hyaluronic acid gel, it is advisable not to overheat (like a sauna) within 4 - 5 days after injection because the gel will quickly melt and disappear. Suppose the patient has just done filler treatment on the nose or cheek area, it is advisable not to sleep on his stomach or tilted for fear the shape of the nose or cheeks will change because the gel has not hardened in 4-5 days.

Minimizing Risk

As with all risky procedures, filler syringe also risks bringing the following conditions:

-After the filler is injected, the common symptoms are pain, swelling, itching, and redness in the injected area.
Bruising or bleeding.
Allergic reactions such as rash and flu-like symptoms.
-can form small bumps beneath the surface of the skin. In some cases, this lump is permanent.
-There can be a Tyndall effect, that is, the discoloration of the skin becomes bluish.
Other effects such as blood clots that lead to blindness, necrosis, and sepsis / blood poisoning are very rare. However, see your doctor immediately if experiencing conditions: unusual pain, white patches around the injected area, symptoms of stroke, visual impairment, numbness in the body, difficulty walking and talking, facial skin down instantly, confusion, and severe headache.

To minimize possible risks, here are the things you need to check before undergoing this practice:

-Location. To prevent infection and accidents, filler injections should be given in a reasonable, clean, and safe place, such as in an official clinic or hospital. - This injection should not be given at home, hotel, spa, or regular outlet.
-Make sure the practitioner who will handle you is a doctor, dermatologist, beauty surgeon, pharmacist, or nurse who has undergone - an official education. This can be proved by the presence or absence of legal certification. Do not be fooled by certain degrees that are not obtained from official training.
-Is the practitioner handling you really trained? In order to provide beauty injections, one must really know how to handle severe allergic reactions and the various reactions that may result from the injections.
- Variety of fillers sold freely, even online. Although easy to get, but the filler can bring permanent and dangerous harm if not suitable for facial skin and not given by the right hands. Therefore avoid buying this filler yourself. Also avoid fillers that come from places outside the doctor's office.
-Make sure your doctor informs you of risks and side effects of injections.
The price of each filler is different depending on the type. Generally more durable fillers will cost more. In addition, prices are also determined by the practitioner's expertise and where the procedure is run. Nevertheless, avoid too-make the price the only benchmark.
-Before the procedure, avoid taking blood-thinning medications, aspirin, nonsteroidal anti-inflammatory drugs, vitamin E, and liquor. Persons with certain conditions should consider avoiding this injection. Filler injections can be hazardous to people with herpes zoster or herpes simplex outbreak because it can aggravate the condition. Before performing the procedure, your doctor may prescribe antiviral medication to a person who has several herpes outbreaks within a year.
-For women who are also interested in filler injections, there are some things that are important to consider before doing it. Here are five facts about injecting filler, as quoted from Women's Health.

1.Select Filler Type Depending on Desired Results
The best and safest filler injections today are those made from hyaluronic acid. Hyaluronic acid is a form of natural sugar that is also present in the human body. The function of hyaluronic acid is to drain nutrients and help the skin retain its moisture, softness and elasticity. Hyaluronic acid fillers are recommended for women who want to make their lips fuller significantly, or to add structures to the center of the lips (cupid's bow).

2.The effect is temporary
Whatever the liquid filler brand, be it Juvederm Ultra or Restylane, the average effect lasts only five to six months before the hyaluronic acid liquid is absorbed and blended by the body. But some types of filler, such as Juvederm Volbella can last up to one year.
3. Requires Preparation
It is advisable not to take aspirin, ibuprofen, fish oil supplements or vitamin E one week before injecting filler. Dermatologist Dara Liotta, M.D. explained this is done to help reduce swelling as a side effect of the use of filler, because inserting fluid into the body will attenuate the blood flow. It is not advisable to drink alcohol before injecting filler.

4. Swelling and Bruising
Some people may experience swelling or bruising on their lips after injecting filler. Your dermatologist may prescribe arnica, a natural supplement, before injecting to help reduce that effect. Dermatologist from New York, Debra Jaliman, M.D., admitted usually will give steroid pills to drink on the day when will inject and after. Dara suggested to compress the lips with ice cubes to make lips feel a little more comfortable.

6.Tak All Women Match Filler Injection
If the distance between the nose and the lips is very close, then injecting the filler to thicken the lips will only make the face look more strange. according to expert skin. Jeffrey Epstein, M.D., filler syringes will usually be better on those who want their upper or lower lips look firmer and fuller. But if you want the upper lip that loosens look more 'uplifted', then the filler is not the answer, but lip fit or removal of the lips.

That's some of the filler suntiik reviews, it turns out the filler injection does not only make it more beautiful but also risky. May we be smarter in choosing every treatment. Understand also its risk is not just the benefits.

Beginner Brow Tutorial Makeup

How To Set Up Eyebrow For Beginners

In addition to eye brow is also one of the determinants to get a beautiful face. Eyebrow is one of the most important parts on the contour of a person's face. This can be evident from the many women who eagerly beautify the eyebrows by forming eyebrows. Well at this time, there is one way that can be done to form eyebrows with perfect that is by doing eyebrow embroidery. Eyebrow embroidery is mostly done by the artist. Surely forming eyebrows in this way requires no small cost. But even so, there are still some women who are willing to do it.

To get a perfect eyebrow shape besides doing eyebrow embroidery of course there is one other alternative that can be done. This method is certainly not as complicated and as expensive as shaping eyebrows with eyebrow embroidery. This is the only way to use an eyebrow pencil.
This eyebrow pencil can be found easily at the nearest cosmetics shops and certainly at an affordable price. Shaping eyebrows using this pencil is very simple and easy and will not take much time.
ols and materials needed
Eyebrow pencil is brown
Brush eyebrows
How to form eyebrows for beginners

1. The main key that must be done to form eyebrows is to maintain the original shape of the eyebrows, because basically everyone has the shape of eyebrows that have been perfectly in accordance with each face. You simply tidy up your eyebrows by using an eyebrow brush.

2. Next step, specify starting point, arch top and eyebrow tail. The starting point of the eyebrow is located on the tip of the inner eye parallel to the nose. While the eyebrow point is that we can know by holding the eyebrow pencil diagonally, then place the bottom edge of the eyebrow pencil right at the tip of the nose, then align the tip of the top pencil right in the middle of the eye. Well, the tip of the top pencil that meets the eyebrows is the point of the eyebrow arch. Meanwhile, to determine the tail of the eyebrow way is, still by holding the eyebrow pencil diagonally, then place the bottom of the eyebrow pencil on the middle of the upper lip and through the edge of the nose and through the tip of the outer eye. Well, where the tip of the eyebrow pencil at the top of the eyebrow is the eyebrow. If you already know the three points, then you make first line under the eyebrow. The trick is, take the point from the bottom of the bottom of the eyebrow, then pull the line up to the bottom of the eyebrow arch, then you pull again the line up on the eyebrow tail.

3. After making a line under the eyebrows, you make another line above the eyebrows. First take the point using an eyebrow pencil at the starting point of the eyebrows up to the point of the eyebrow arch, then from the eyebrow curved point pull the line again to the tail of the eyebrow until it meets the underside of the eyebrow that had previously been formed.

4. Next, be deeply deep in the eyebrows by using a brown eyebrow pencil.


5. Then, undo by applying a black eyebrow pencil.

6. The last eastern is, comb back eyebrows using eyebrow brush for the results neatly.

Types of Diet Juice


This green detox juice


 recipe has become one of the popular juice recipes that have a balanced mix of fruits and vegetables. Not only can you lose weight, but this juice is also very good for detoxification of the body naturally. In this recipe using some types of fruits and vegetables such as apples are very rich in nutrients, a source of vitamin C, contains polyphenols and is also very beneficial for health and diet. The spinach used in this juice recipe is also high as well as and contains some important vitamins such as vitamin B1, vitamin A, vitamin C, carbohydrates and also essential minerals that your body needs to erode fat and lose weight naturally.

Green Detox Juice Material

2 green apples
3 stems celery without leaves
1 cucumber fruit
1/2 lemon in peel
1 piece of ginger
1 mint stalk

How To Make A Green Detox Juice

Cut the green apple and then remove the seeds and bone of the middle without peeling first.
Cut as well stems celery without leaves into small slices.
Wash the cucumber and slice it more easily
Wash and peel ginger and sliced thinly.
Put all the ingredients into the blender and puree and if it is too thick it can be added with a little water.
To adjust the sweetness, you can increase or decrease the apple portion in the juice.

Apple Carrot Juice


One of the juice recipes for this diet has a very delicious and refreshing taste and is rich in nutrients ranging from vitamins, minerals and also antioxidants. Carrots are an excellent source of vitamin A beta-carotene and also a good source of B vitamins, vitamin K and potassium. This apple carrot juice tastes so sweet that it is suitable to be enjoyed anytime and by anyone. While the apple content is also very useful for this diet while providing a delicious flavor for your daily diet juice.
Carrot Apples Juice

1 large apple fruit
1/4 pineapple fruit
2 large carrots
2 fresh ginger

How To Make Apple Carrot Juice

For this type of apples can be selected according to taste and then washed and cut into pieces and discard the seeds and bones of the middle.
Prepare 1/4 pineapple peelings that have been peeled and cut into pieces and remove the hard bone in the middle
Rinse well carrots without peeling and cut into small pieces
Wash 2 pieces of ginger and peel and sliced thinly
Put all the ingredients into the blender and add with a little boiled water and blend until smooth.
You can drink juice with pulp or it can be filtered according to taste.

Apple Lemon Juice


This juice is one of the soft drinks but high in nutrients that is suitable to serve as a breakfast menu or a snack in between your meal time. The use of lemon juice in this juice will provide a very fresh flavor while eliminating the accumulation of fat in the body so that weight can go down naturally. While the content of fiber, vitamins and minerals in apples will help the process of weight loss while adding sweetness in the juice without the need to add too much carbohydrate value than if using additional sugar. While the cucumber fruit used will meet the water needs in your diet.

Lemon Juice Juice

2 pieces of lemon
4 apples
2 cucumbers
1 cup water
How To Make Apple Lemon Juice

To make lemon juice apple, split the 2 lemons into 2 parts and squeeze the lemon juice.
Split two apples and then discard the seeds and bone of the center then cut into pieces to be more easily mashed
split two cucumbers then sliced ​​into smaller pieces
Add 1 cup water in blender along with a juice and blend until smooth and evenly.
Drink immediately juice and do not store, can be filtered or drunk with the dregs.

Lemon Spinach Juice
This juice is a juice to lose weight as well as natural detox that will also give you energy so it is very good to eat at breakfast. To add a sweet taste in this juice, can be added with pure honey. The combination of several types of vegetables such as spinach, kale and celery will be a source of fiber, iron and energy for your dietary needs while providing a longer satiety. While apples, ginger and lemon will meet the needs of vitamins and minerals and erode the buildup of fat in the body as well as warm the body obtained from the use of ginger in the juice.

Lemon Spinach Juice


1 cup of spinach leaves
2 celery stalks
1 slice of ginger
2 apples
1 lemon
How To Make Lemon Spinach Juice

Spinach leaves, celery then put in blender
Thin slices of ginger and then put in a blender
Cut the apple, remove the seeds and hard bones in the middle and then cut the dice and put in the blender
halve the lemon and squeeze the juice and pour it in a blender
Add with 1 cup water and a little honey then blender until smooth, drink until finished

Pineapple juice, Grapes and Parsley

This juice is very well consumed to lose weight as well as a natural body detox. In addition, for those of you who often experience allergies to the weather is also very good to consume this juice because the content of vitamin K, vitamin A, folate, iron and vitamin C from parsley will help the body in overcoming allergies. Meanwhile, in addition to increasing the intake of vitamins and minerals, the use of pineapple, wine and lemon will provide a fresh and sweet taste into this detox juice.

Ingredients to Make Pineapple Juice Parsley

1 cup of pineapple
1 cucumber fruit
1 lemon
1 cup seedless wine
1/2 cup of parsley leaf
1 apple

How To Make Pineapple Juice Parsley


Cut the cucumber and put it in the blender
Cut also pineapple into diced pieces and put in blender
Squeeze water from a lemon then pour it into a blender
Add also 1 cup of unleavened wine and apple slices to the blender
Finally, enter 1 cup water then blender until smooth and drink until finished

Orange Juice and Pears


The combination of various fruits and vegetables in this juice is also very powerful in losing weight and has a very delicious taste. In addition, when it becomes a juice can also be made like ice cream by freezing the juice in a popsicle mold so it can also be enjoyed by children. Nutrients in pear such as vitamin K, vitamin C, copper and potassium will be very good for maintaining healthy bones, weight loss and also natural antioxidants coupled with a variety of other ingredients that complement the nutrients in this juice.

Ingredients Juice Orange Sweet Potato

2 medium size apples
1 sweet potato
1 celery stalk
1 orange fruit
2 medium size pear
How To Make Orange Pomegranate Juice

Peel 1 piece of yam and then diced and put in blender
Add with 1 orange that has been peeled and removed seeds.
Remove the seeds and the middle part of the bone from apples and pears and then diced and put in a blender
Add with slices of celery leaves and one glass of water and blend until smooth and drink until finished.

How To Overcome Dry Facial Skin

How To Overcome Dry Facial Skin


How To Overcome Dry Skin Naturally

1. Fruit avocado, banana and papaya

Fruit avocado, banana and papaya other than famous for its fiber is good for digestion, it turns out these three fruit has the benefits for beauty one of them is overcome dry skin.

You can use alpuket, banana and papaya fruit as a natural mask to prevent dry skin. The way is quite easy, namely alpuket fruit, banana and papaya are cooked in mixed into one. After that mash the fruit mixture until smooth.
If it is smooth, apply on body parts such as hands, feet, neck, face and other dry skin areas. After that leave for about 15 minutes to dry. Rinse with warm water. For optimal results, do it twice a week.

2. Apple

Apple is famous for its benefits that can rejuvenate the skin, thus making the skin stay healthy. In the apple fruit contains potassium and tannin substances that are useful to keep the skin moisture so that the skin does not dry easily and make the skin stay shining.

In order for your skin to stay healthy, you can use apples as a medicine to overcome dry skin. The trick is very easy, namely the apple grate, then the dregs from the grated is applied to the body or dry skin. If it's 20 minutes, rinse with cold water.

3. Cucumber

Cucumber has a substance that is good for skin health. That's why many beauty products use cucumber as the main ingredient. If you are experiencing dry skin, do not need to use beauty products with a decent price, simply by using the dregs of grated cucumber, then apply on the face or areas of dry skin.

Allow to absorb for about 15 minutes, then rinse with cold water.

4. Egg yolk

Eggs are not only used as foods rich in protein. Eggs can also be used as ingredients for hair and skin beauty. For those of you who have problems with the skin, especially dry skin, you can use egg yolk as an alternative to treat dry skin.

The trick is to mix 1 teaspoon egg yolk with 1 teaspoon of honey and 2 teaspoons milk powder. Stir until evenly to form a paste. Apply on the body as well as other areas of dry skin. Let stand for approximately 15 minutes. Then rinse with cold water.

5. Honey

Honey is well known for its benefits for both body and skin health. Honey has benefits in maintaining skin moisture and is able to brighten and brighten the skin. Even honey is often used as a remedy to keep the lips moist. Well, if you have dry skin, can use honey as a medicine.

The trick is to mix half a teaspoon of honey with a little rose water. Apply on dry areas of skin. Let stand for 15 minutes then rinse with warm water.

6. Almond Oil

Want to have healthy skin beautiful and dry free? Almond oil is one of the most powerful alternatives. In addition to some of the above-mentioned ingredients, Almond oil is one of the best and most natural ingredients that have powerful benefits in dealing with skin problems, especially dry and cracked skin.

The trick is very easy, just apply a little almond oil on the face, dry skin area and even the whole body. Use before bath.

7. Lime

Lime is undoubtedly a benefit to skin health. Besides beneficial to treat acne, lemon works to cleanse the skin so the skin will look brighter.

In order to keep your skin healthy and not dry, use a mixture of lemon and alpuket fruit that has been mashed. Apply to dry skin, let stand for 20 minutes then rinse thoroughly using cold water.

Well, some natural way tips to overcome dry skin you can apply as a skin care treatment that does not need to spend a big budget.

Solve Acne Problems with Natural Materials Here

Solve Acne Problems with Natural Materials Here

Skin health is a reflection of the internal health of our body. Beautiful skin shows proper care, and a healthy diet. Skin full of blackheads and pimples indicates oxidative damage, malnutrition and hormonal imbalances.

Acne skin affects tens of millions of people worldwide from all ages every year, from mild to severe. Acne causes pain on the skin, it can grow on facial skin, back, chest and even arms. If not treated immediately, acne can lead to reduced confidence because leaving a hollow mark on the skin.

Natural ingredients for treating acne

Green tea
Green tea has antimicrobial and antioxidant compounds that can help fight acne. To get a faster effect, use a cup of cold green tea as a facial cleanser.

Honey
The nature of honey antibiotics can help fight acne, and treat acne scars. Apply a teaspoon of honey to the affected area of the skin, or make a mask by mixing 1/2 cup of honey with 1 cup of oatmeal and leave for 30 minutes

Mint
Mint can help remove oils on the skin that can clog pores. To help clear the acne, mix 2 tablespoons of freshly chopped mint with each two tablespoons of yogurt and oatmeal (use a blender to smooth the oatmeal). Leave this ingredient in your face for 10 minutes, then rinse with water.

Aloe vera
Aloe vera is a natural ingredient to treat acne and acne scars. Aloe vera is also known for its benefits in removing burn scars, accelerating the healing process of skin wounds, and fighting infections. Rub the gel from aloe vera plant with a spoon, and apply it to acne.

Lemon
Lemon acts as an exfoliant, skin lightener, and disinfectant to reduce scars due to acne and prevent new pimples from forming. Rinse face using clean water, dip the cotton into lemon juice, then apply on the acne prone skin, then rinse with cold water.

Mangosteen Skin Extract
One way to get rid of acne with natural ingredients is by using herbal remedies that contain mangosteen skin extracts, such as Beauty Golds. Mangosteen skin is famous for its many benefits for skin health. Among them is to relieve inflammation or inflammation due to the appearance of acne, reduce the amount of acne, regenerate tissue and skin cells, fade black stains acne scars, accelerate wound healing acne scars and many other benefits

Apple Vinegar
Apple vinegar contains malic acid and lactic acid that reduces red marks on the skin, and treats acne. Beat apple vinegar before use, use cotton and apply on acne prone skin.

Papaya
Papaya is an important ingredient in many beauty products on the market today. Raw papaya is a natural acne remedy that removes dead skin cells and excess lipids from the surface of the skin, and makes it soft and smooth.

Lipids are a common term for fats that cause oily skin. Papaya also contains an enzyme called papain, which reduces inflammation and helps prevent pus form.

Garlic
Garlic is a natural ingredient to treat acne and acne scars are very good because of its antibacterial properties. To get the benefits under the white for the skin, you can eat directly or by putting it into a juice mixture.

So how to get rid of acne with natural ingredients without using drugs that could adversely affect your health.


5 Ways to Choose a Foundation Suitable for Face Skin

5 Ways to Choose a Foundation Suitable for Skin


 The skin type and skin color of each person vary, so everyone will need different types and colors of the foundation as well. This is worth noting, because if you choose the type and color of the foundation, your skin color will look uneven, black spots are not perfectly closed, or even make the skin look dull and so appear acne.
Therefore, recognize in advance your skin type, whether normal, dry, or oily. Then notice the basic color of your facial skin. Knowing the skin type and basic color of the skin well will make it easier for you to choose the right foundation. More details, here are 5 steps or how to choose the foundation that is most suitable for facial skin

1. Know Skin Type

Everyone has his own skin problem. There are skin dry, oily, normal, and there is also a combination like normal tend to dry or normal tend to oily. Usually in the packaging of foundation products already included, which foundation is suitable for oily skin or suitable for acne prone skin. This will make it easier for you to choose the most appropriate foundation. Even if the description is not included on the foundation packaging, you can discuss the selection of the foundation type in the shop keeper, or if there is a beauty advisor, better still.

2. Select the Foundation Texture


The foundation texture is solid, liquid, gel, cream, to powder. Texture is different then its function is different too. The following is a description of the foundation functions :

Solid Foundation
Perfectly used for oily skin.

Liquid Foundation
Suitable for dry skin because it gives a moisturizing effect. But, liquid foundation is also suitable for normal and normal skin tend to dry or oily, because its formulation is very light compared to other texture foundation

Foundation gel
   Suitable for dry and normal skin tends to dry, because the texture is somewhat similar to liquid foundation. This Foundation can be used for acne prone skin

Foundation cream
The shape is similar to solid foundation, it's just more creamy and creamy testurnya. But there is also a form really like cream. This cream foundation texture is suitable for all skin types, it's just usually used by people who have experienced signs of aging.

3. Recognize the Basic Skin Color

The first step in choosing the right foundation is to know the basic color of your skin, because it will affect the color of the foundation that best suits you. The base color is not determined by visible skin tones, such as brighter or darker, but is categorized into three with the color of the blood vessels as a comparison, namely: cool, warm, and neutral.
he basic skin color is cool for people with blue blood vessels. The basic color of warm skin for people with green blood vessels. Finally, the basic color of neutral skin for people with blood vessels that are not very blue or green. Usually, if exposed to sunlight, the skin of the owner of the basic skin color cool will look pink. And for the owner of the basic skin color warm, skin color will look bronze.

4. Choose the Most Similar Color

After recognizing the basic color of your skin, whether cool, neutral, or warm, the next step of choosing the foundation is to choose the foundation with the color that is most similar to the base color of your skin.
Do not choose a foundation whose color is one level darker or brighter than the base color of your skin, especially if the color is much darker or brighter. Because, if you choose a foundation that color away with the basic skin color, later when used your skin will be seen striped with other parts of your skin such as the neck and hands. Can be seen in the picture above, if the basic color of your skin cool or tend to pale, then the choice of suitable foundation color is that has a shade of pink to red. If the base color of your skin is neutral, then the choice of suitable foundation colors is that which has a natural brown shade, this option is also suitable for tan skin. Finally, if the base color of your skin is warm, then the choice of suitable foundation colors is that have a yellow to light brown shade, this option is also suitable for dark skin.

5. Try Direct on the Face

Often if you visit the makeup counter in the mall or in other cosmetics stores, you will be given a tester foundation on your hands. This is less effective, because the skin color of the hand is different from the skin color of the face. Therefore, try the foundation directly on your facial skin. First of all, remove your makeup around your cheek or chin. After that, apply a sufficient foundation on the cheeks or chin that has been clean of makeup. You can also ask the shop keeper or better ask the beauty advisor there if any, they can help you choose the color of the foundation that best suits the basic color of your skin. That's 5 ways to choose the foundation that best suits your skin. Hopefully how to choose this foundation is useful for you.

4 How to Choose Highlighter According to Your Skin Color


HIGHLIGHTER


to use a highlighter can not be careless. There are things to watch out for before applying them to the face. One of them is the color selection. Each skin tone has its own highlighter color.

If you have fair to light skin tone,
According to Mally Roncal, designer makeup artist and founder of Mally Beauty, skin with skin tone fair is best suited to highlighter that has a silvery color or a bit of lavender. The pearl pigment will subtly lighten your skin without covering it or even make it pale.

If you have light to medium skin tone,
Try looking for peach or rose-gold color. Both have warm and cool color tones on your skin without looking too much. This color will make you get a brighter face natural and not excessive. In addition, this color can also cover the skin is dull and reddish.

If you have medium to olive skin tone,
Well, for you who have skin tone medium to olive, avoid colors that are too bright or shining, because it can make your face like frozen. Highlighter with warm colors like champagne or peach color you can choose to increase the natural light on the face.

If you have olive to dark skin tone
According to Max Bronner, makeup artist for Make Up For Ever, if your skin tends to be dark, choose a gold or bronze highlighter. Both are more warm in the pigmentation and the color will make a natural impression on your skin.

HOW TO MAKE A GLOWING FACE


FACE GLOWING


1. Wash your face
The first step in how to make a glowing face is to wash your face regularly. Yes, trivial things that are done every day can have a big effect for your skin, loh! Washing the face can remove impurities, shrink pores, delay premature aging, maximize skin regeneration, prevent dull skin, and eliminate and prevent acne coming back. Lots, yes, the benefits of washing face? Is after knowing this, you still lazy to wash your face twice a day routine?

2. Remove Make Up

If you use makeup for everyday activities, the chances of your facial skin become dull the higher, loh! Cosmetics can indeed make us look beautiful because the shortcomings in our face will be closed. But, if you use makeup without removing it for long periods of time, for example overslept before removing makeup, your facial skin will be prone to acne.
In addition, a makeup that is only removed with origin will clog the pores and can make the face look dark. For that, immediately remove makeup when your activities are done. Let your skin have a breathing time. And, use a special makeup cleanser, do not just water and soap alone, for make up perfectly lifted.

3.Exfoliate
Eksfoliasi better known by the term face scrubbing or facial scrape. Occasionally you have to scalp the facial skin. This exfoliation process can remove dirt that is not wiped clean only with a normal face wash. Facial scrub can also remove dead skin cells, so it will leave a soft facial skin, clean, supple, and sparkling. Do face scrubbing as much as 2x a month for best results.

4. Toner
How to make this glowing face is a secret of Korean skin beauty. Koreans diligently use toner after washing their face, after removing makeup, and before applying the treatment cream. Toner is useful for cleansing and balancing skin pH. Toner can also clean the pores of the skin from the cleaning process of makeup that has not been perfectly clean. In addition, the toner works to moisturize the face as well

5. Essence
n how to make a Korean-style glowing face, you should not miss the essence. This thing is different from face toner, yes. Essence is a viscous liquid that works to moisturize and restore the skin. With regular use, your facial skin will look younger.

6. Ampul
Ampul is similar to the facial serum, it's just more content and more rich benefits. Usually the ampoule is categorized in different skin types. There are ampoules for all skin types, sensitive, dry, combination, oily, and others. If you do not have an ampoule, just use regular serum, the function is more or less the same, really

7. Moisturizer
Never underestimate facial moisturizer. Maybe some of you are lazy to use moisturizer, because the foundation or BB cream alone is enough. In fact, let your skin oily though, moisturizer is an important thing for the skin. Moisturizers can keep skin moist all day even if you use makeup for a long time

8. Eye Cream
Korean people give extra care to their eyes. Eye cream is actually just like a moisturizer, just texture and content different from ordinary facial moisturizer. Eye cream is needed because the skin under the eyes is the same as the skin on the neck, which is drier than other skin areas. The skin in the area under the eyes and on the neck does not have sebaceous glands that produce natural oils. In addition, this skin area is thinner than the skin area around the other face. Hence, you need really called eye cream, so the skin of the eye area remains well hydrated throughout the day.

9. Sheet Mask
If you look at cosmetics and skin care Korea, you must know this one thing. His name is a sheet mask. This facial mask is a tissue that is not easily fragile. This tissue has been soaked in essence that will later move your skin when worn. Usually this tissue-shaped face mask can quickly restore skin moisture. In addition, sheet mask from Korea also contains anti aging and can make skin look glowing.

10. Face Mist
How to make the last Korean-style glowing face is to use a face mist. In Indonesia this is probably not very popular, but abroad like in America and in Korea, face mist is a common object.

Success Make Exotic Skin in This Way

EXOTIC LEATHER


WHY white skin much coveted, not a few women who choose brown skin. If you are interested in following it, this can be tried.
Brown skin does not always look dull. Precisely, the appearance of brown on the skin can raise the exotic side of the owner. In addition to tanning, eating some food support can succeed your intention to make brown skin.

Here's a list of foods that make skin brown :

Carrot

Better to consume raw carrots rather than ripe carrots to make the skin brown. Make carrot or carrot juice. Betakaroten on carrots helps the skin to brown quickly. For those of you who do not like carrots, some pharmacies sell beta-carotene capsules.

Apricot

Apricots help provide a golden brown color for the skin. By eating two small apricots in the morning at breakfast, it is guaranteed that apricot-containing betacarotene can activate melanin, a chocolate-causing cell.

Strawberries and cherries

Strawberries and cherries are high in vitamin C which prevents aging and protects the skin from the harmful effects of the sun, as well as improves skin quality.

Olive oil

Olive oil is rich in vitamin E which has a healing effect on the skin, enabling cells to regenerate well and slow down the arrival of the first wrinkles. Use olive oil when cooking meat or making a salad.

Egg

Egg yolks are rich in vitamin A. Eat once or twice a week. Eggs are also rich in refreshing minerals and turn on the skin.

Water
Drink a few glasses of water every day to keep skin moist, elastic, and not dry
Coconut oil
  will be absorbed fairly quickly by the skin and energize the layers that produce melanin beneath the skin surface. So, Naia's Companions only need to spend less time in the hot sun.

So, friends BEAUTY TODAY already know dong various advantages of coconut oil than packaging products in terms of making beautiful skin and brown shine .. Good luck!

How To Eliminate Natural and Permanent Ore Smell

How To Eliminate Natural and Permanent Ore Smell


Excessive sweating causes unbearable body odor, this is because the fungus or germ mixes in the sweat. But the sweat that comes out is one of the body's metabolic activities that must be passed every day to remove substances that are not needed by the body or the rest of metabolism. But often you find your sweat has a very stinging smell and this will bother you to continue the activity. Not infrequently most people will use deodorants made from chemicals sold in stores. Even if you already know that these chemicals have side effects are still used, such as skin allergies.

Ginger
This spice is very much a lot of usefulness as well as gastric purifier and body warmer ginger can also be used to repel body odor. Diligently consume fresh ginger can remove body odor or apply grated ginger on the armpit and let stand for 10 minutes then rinse with cold water.


Lime
  lemon is a fruit that many benefits in the field of cuisine, health and beauty. One of them is menghingkan body odor premises lemon, how to cut a thin lemon and sprinkle whiting, apply on the armpits and let stand 10 minutes then rinse. And if you do it diligently it will eliminate the underarm odor and also can make a bright armpits. Two benefits in one action are not.


Apply Vinegar
Both apple vinegar and regular white vinegar, can help lower the pH of the skin so that bacteria are difficult to grow. This method is recommended because bacteria can not live in acidic environments.

Simply apply a little vinegar to the armpit area after you have finished bathing. But remember, do not do this if you have just shaved your armpit hair. This method is safe for the skin as long as there are no injuries, but it's good to try first by dripping a little vinegar on the skin surface and see the reaction after 5 minutes.


Tea Tree Oil
Tea tree oil has a soothing aroma and has antiseptic or anti-bacterial properties. Apply a little of this oil to lower the pH of the skin, so bacteria can not survive. If you sweat a lot, should armpit at least four times a day and dab back tea tree oil.

Cucumber mask
cucumber is one of the green vegetables that you can use as a mask for the armpits or consumption directly. Cucumber has antioxidant and anti-bacterial substances that are high enough to help reduce body odor. How to use cucumber can be done in two ways:

1. As a mask

Stick the cucumbers on the armpits after every 10-15 minutes shower, do it regularly every day.

2. Direct consumption

Consumption of raw cucumber can reduce body odor in the body.


Garlic
  also the cause of body odor, but if used for external medicine, it is better. Because this herb has a powerful antioxidant content to overcome body odor. You simply cut the garlic and apply on the armpits.


GOOD LUCK !

REST OF HAIR IN 1 WEEK

METHOD 1 USING HAIR CARE


1. Do a scalp massage with warm oil.

 Scalp massage with warm oil using natural oils to improve scalp health and promote hair growth. Oils such as coconut oil, olive oil, jojoba oil, and argan oil can be used during scalp massage. Note, scalp massage with warm oil has not been scientifically proven to encourage faster hair growth. [1]
Start by warming the oil on the stove or in the microwave. Try first the oil before it is used to make sure the oil is not too hot; You need a comfortable temperature so it will not damage the scalp or hair.
Use your fingers to massage the scalp using warm oil in a circular motion and slowly. If there are spouses or friends, ask them to help massage your scalp. Ask to massage your head with your fingertips for 20 minutes.
Then, wipe the oil all over the hair and let stand for 30 minutes. Shampoo, perhaps more than once, to remove the oil.
Do this massage on the day you usually shampoo. So, you do not have to shampoo more often than usual.


2. Make a hair mask.

Give hair growth cream to hair and stimulate hair follicles to grow faster by applying a hair mask once or twice a week. You can make a natural oil mask or buy a hair mask at your local drugstore. [2]
Mix 250ml of coconut oil with 1 tablespoon of almond oil, macadamia oil, and jojoba oil. Apply a mask on wet hair and leave for 10 minutes. Then, shampoo and provide conditioner as usual.
So that you do not too often shampoo, use this hair mask in the day you usually shampoo.


3.Try care with castor oil.

  Castor oil is known for its beneficial effects on skin and hair care. [3] Using a castor oil hair mask can help hair to grow faster and healthier. [4]
Begin to massage the scalp with castor oil and let the oil absorb into the hair. Wrap the hair and head with a plastic head cover for the bath so the oil sticks. You need to put a towel on the pillow so that the oil does not stick to the pillowcase.
Leave the oil overnight. The next morning, shampoo and conditioner as usual, ensuring all the oil is gone.


4. Apply apple cider vinegar to rinse hair.

Apple cider vinegar is very effective to remove dirt, grease, and oil on hair, as well as remnants of hair styling products. You can use apple cider vinegar as a natural alternative on days when you do not use shampoo or dab after a shampoo and conditioner routine. [5]
Add two tablespoons of vinegar to 500 ml of water and rinse hair with this mixture. Although the water has a strong smell of vinegar, but this odor will disappear.


METHOD 2 CUSTOMIZE ROUND HAIR CARE

1. Wash your hair two or three times a week.

Reducing the shampoo routine to two to three times a week will make the oil on the scalp permeate into the hair. Thus the hair can moisturize and improve its condition.
If the scalp looks very oily or itchy after shampooing two to three times a week, you need to increase the shampoo time every week. To shampoo the hair appropriately, rub the shampoo on the scalp, while massaging the scalp when you do it, then let the shampoo soak the strands of hair when rinsing hair.
Just wipe the shampoo over your scalp while massaging it. Then, allow the shampoo to flow to the hair shaft when rinsed.


2. Use conditioner everytime you shower.

Unlike shampoo, conditioner should always be used every time you shower (and your hair is wet). The conditioner can help replace lipid and protein in the hair shaft and make hair grow longer and healthier.
3. Rinse hair with cold water after bathing.

  Rinsing hair with cold water after a hot bath can help close the cuticle and make hair stronger when laid out.
You should also consider lowering the bath water temperature when washing your hair with shampoo and conditioner so the hair is not exposed to too hot and steamy water
4. Do not wrap wet hair with a towel.

Although you may have a habit of wrapping and twisting the hair with a towel when it is showered, it can cause damage and strain to the hair. Wet hair is very fragile, so change the way to wrap your hair using a towel after a shower by patting hair using a dry towel. [8]
If you want to wrap your hair with a towel, you can use a thin towel and a soft micro fiber towel. These towels are made of a soft material for hair and can dry hair without damaging it.
5. Brush the hair before going to sleep.

  Brushing hair every day is not good for hair and inhibits its growth. Instead, use a bristle brush to brush your hair before going to sleep. This will help spread the oil to the scalp and hair so it stays damp naturally.
Start off the scalp and use a flat sweep on each part of the hair at least once.
Brushing hair once a day before bed can also improve the circulation of the scalp, which can improve health and promote hair growth. Although hair brushing has not been scientifically proven to trigger faster hair growth, it can improve overall hair health.
6. Avoid hot hair styling equipment.

  One of the most common ways that can damage the hair and inhibit hair's ability to grow is by using hot hair styling equipment such as hair dryers, hair straighteners, and curling irons. Try to reduce or eliminate the use of equipment from the hair care routine. Try a natural hair appearance so as not to inhibit the growth of healthy hair.
If using a hot hair styling device, you should use it with a low heat setting and use a gel or a heat-protective cream to avoid hair damage.
7.Do cutting hair.

Although it seems unreasonable to cut hair to encourage rapid hair growth, asking hairdressers to cut your hair can help hair to grow faster and healthier. Cutting hair regularly will prevent the tip of the forked hair from affecting the strands of hair, which will reduce the need to cut hair. The tips of the forked hair can cause damaged hair to the top of the hair, so the hair becomes shorter and you should visit the hairdresser more often.
Hairdressers will cut ½ cm long hair every 10-12 weeks to prevent the occurrence of broken branching heads. Try to make arrangements that are consistent with your hair stylist so that your hair stays healthy and unbranched.
Hair cutting frequency is determined by the hair growth rate as well as the extent of damage to the tip.

METHOD 3 ADJUSTING DIET AND HABITS

1. Take supplements of hair growth promoter.

Multivitamins that are formulated to promote hair growth may be a good choice if the food does not adequately meet the nutritional growth of hair. Look for vitamins labeled "For hair" such as biotin tablets, which contain key vitamins such as biotin, vitamin C, and B vitamins that promote hair health. These supplements can help hair growth faster and healthier. [12]
Before taking supplements, you should consult your doctor to ensure the proper dose and the supplement does not interact negatively with any medication you are currently consuming.
The results and side effects of biotin and hair growth vitamins may vary for each user.
Look for supplements that have been tested by third parties such as USP, NSF, or Consumer Lab.
2. Eat foods that are high in protein.

Increasing protein intake will increase the growth of healthy hair and ensure hair does not experience baldness or loss. Ensure balanced food intake consists of meat, fish, beans, and whole grains. If you are vegetarian, be sure to get enough protein through foods made from soy, beans, and whole grains.
If you want to follow a high protein diet, it is important to choose protein sources wisely. Avoid processed meat or high fat dairy products, because it can trigger other health problems.
Make sure you also get enough healthy carbohydrates in foods high in fiber and full of nutrients such as whole grains, fruits, and vegetables
3.Try the "reversed" method.

The "inverted" method is when you turn your head so that it is near the heart, encouraging blood flow that can promote hair growth. Some people who are accustomed to the reversed method can see tangible results, ie hair growth along 0.6 to 1.2 cm after one week. Although there is no scientific evidence that this method can be used, this is not a dangerous method that you can try to increase hair growth.
You can do yoga poses like downward dogs (body bends, arms extended to touch the floor), shoulder stand (body lying on your shoulders, legs lifted straight up), or head stand (upside down with the head on under). The goal is to have the head above the heart, so the blood flows to the head.
You can massage the scalp with coconut oil before turning the head for 4 minutes a day to encourage hair growth.
You may also need to measure the length of the hair at the beginning of the week so that it can record progress.
Return the body to its normal position slowly so you do not feel dizzy. At the end of the week, measure your hair again and notice how long your hair grows in a week.